- +1 (778) 227 - 1004
- info@afkmedia.ca
- Vancouver, BC V6B 2Z4

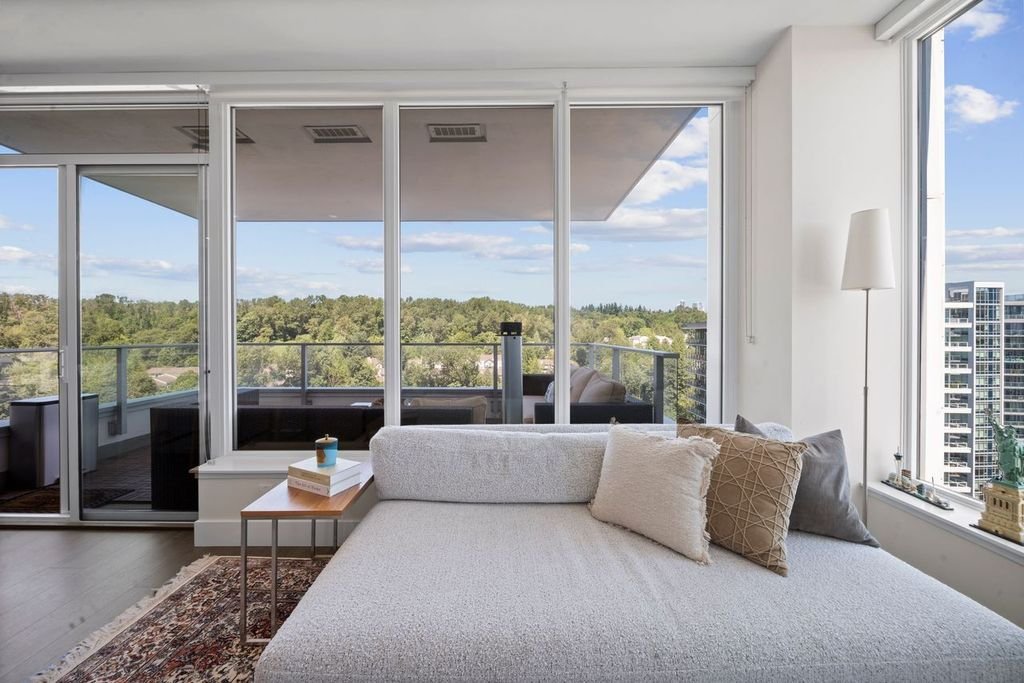
The Impact of Lighting on Real Estate Photography
AFK Media specializes in stunning real estate photography, cinematic video tours, drone, virtual tours, and detailed 3D/2D floor plans across the Lower Mainland. We use cutting-edge tools and a sharp…

Table of Contents
AFK Media specializes in stunning real estate photography, cinematic video tours, drone, virtual tours, and detailed 3D/2D floor plans across the Lower Mainland. We use cutting-edge tools and a sharp eye to make homes look their absolute best. In this guide, we’ll break down how lighting changes everything in a photo, from mood to depth to buyer trust.
Real estate photos live or die by light. The same room can feel flat and lifeless under dull, mixed bulbs, then suddenly look spacious and inviting with soft daylight. Dark corners whisper “small,” bright, well balanced frames say “open.” This article supports our full guide, How to Take Professional Real Estate Photos, and includes practical real estate photo techniques you can apply on your next shoot.
“Users spend approximately 60% of their time looking at property photos versus 20% on property descriptions.”
Curated from Imgix
Key Takeaways
- Lighting shapes mood, depth, and clarity. Brighter, even lighting builds trust and shows true finishes.
- Natural light is ideal, but it’s not always available. You can shape light with flash, bounce, and exposure blending.
- The best results come from consistent colour and balanced highlights. Avoid harsh hotspots and heavy casts.
Why Lighting Matters in Real Estate Photos
The psychology of brightness: buyers trust well lit homes
Bright, even light helps viewers process details quickly. People associate clarity with honesty, so clean exposures feel more trustworthy. Eye tracking studies also show buyers spend most of their time on the photos, not the description.
Poor lighting hides details and shrinks space
Underexposed corners, muddy shadows, and heavy colour casts make rooms feel smaller and older. Appliances lose their sparkle. Wood tones look dull. On MLS, that translates to fewer clicks and fewer showings.
Light sets the tone: cozy, airy, modern, or dramatic
Warm window light at golden hour suggests comfort. Crisp midday side light reads modern and minimal. A gentle fill flash in a bathroom can make tile and mirrors look fresh rather than stark.
Natural Light: The Gold Standard

When to rely on sunlight
Daylight is flattering and familiar. For north facing rooms, aim late morning to early afternoon. For west facing spaces, late afternoon often delivers soft, dimensional side light. If the forecast is gloomy, a tripod and slower shutter can keep frames bright.
How to manage direction
Position your camera so the main window is at a slight angle. This keeps glare off glossy surfaces and adds gentle shadow that defines shapes. Side light adds sculpting, front light flattens.
Window covering tricks
Sheers cut contrast and diffuse beams. Blinds can control streaks and hide views. For homes with a selling view, bracket exposures to capture both interior and exterior, then blend in post.
Artificial Light: When and How to Use It

What type of flash to use
A speedlight bounced off a wall or ceiling gives a fast, natural fill. Use a softbox or umbrella to soften highlights on reflective finishes. Avoid bare flash directly into the room.
Avoiding harsh shadows and hot spots
Keep the light large and off axis. Bounce behind you or into a reflector. If ceilings are dark, bounce into a neutral wall. Watch for ceiling hot spots, especially in small bathrooms.
Balancing flash with ambient light
Blend ambient exposures with subtle flash frames. This keeps window glow and practical lamps looking natural while interiors remain clean. Exposure blending or gentle HDR helps manage range without that over-processed look. In professional real estate photos, this balance is what helps a space look bright and true to life without losing the warmth of natural light.
“Video courtesy of Nathan Cool Photo, used under fair use for educational and informational purposes.”
Common Lighting Challenges & How to Solve Them

Mixed lighting (yellow + blue tones)
Mixing warm tungsten with cool daylight can make walls and counters look odd. Solve it by turning off bulbs and relying on window light, or match bulb temperatures. Correct remaining casts in post.
Dark corners and bathrooms
A bounced speedlight or slim LED aimed into a wall can lift shadowy spaces. Try blending frames: one for the room, one for the vanity or shower, then merge carefully.
Overexposed windows
Bracket your shots: one for the room, one for the view, and one underexposed for highlights. Blend by masking or HDR. Aim for believable contrast rather than perfection.
Using HDR to balance extremes
Keep HDR subtle. Use small brackets, align carefully, and avoid halos. Combine with a flash frame to reduce shadow noise, then finish with modest contrast and colour tweaks.
Recommended Tools for Better Lighting

Off camera flash or bounce card
A speedlight plus a bounce card can solve most lighting problems. Place the card near the lens axis to push soft fill into corners. Keep power low to maintain natural ratios.
LED panels for interior shoots
Slim bi colour LEDs are great when flash reflections are risky. Set colour temperature to match the dominant source, usually 5000–5600K for daylight or 2700–3200K for warm bulbs.
Tripod + slow shutter combo
Dragging the shutter brightens a frame without raising noise. Watch for curtain or tree movement outside that can blur in window exposures.
Editing software to fine tune
Use Lightroom or Capture One for global exposure and colour. Blend exposures with layer masks or HDR merge. Keep contrast modest to avoid halos and preserve textures.

Conclusion
Great lighting is the difference between a scroll and a showing. Natural light gives warmth and realism, artificial light adds control, and careful blending keeps details true. When balanced, photos feel natural, surfaces pop, and buyers stay engaged.
Experiment, review, refine. Over time, you’ll develop a reliable look that speeds up your workflow and keeps clients happy.
Book Your Next Listing Shoot with AFK Media

Ready to light your next listing properly? Book a session with AFK Media, explore our portfolio, or reach out for a custom plan that includes photo, video, and floor plans. We’re based at 422 Richards, close to The Poke Guy, and we serve the entire Lower Mainland. Let’s give your property the spotlight it deserves.
Latest posts
Popular Posts
Interviews, tips, guides, industry best practices, and news.
