- +1 (778) 227 - 1004
- info@afkmedia.ca
- Vancouver, BC V6B 2Z4

How to Take Professional Real Estate Photos (Gear, Lighting, Angles, & Editing)
Take Professional Real Estate Photos Introduction Ever scroll through real estate listings and feel instantly drawn to some homes? That’s no accident, it’s the magic of professional photography. In today’s…

Table of Contents
Introduction
Ever scroll through real estate listings and feel instantly drawn to some homes? That’s no accident, it’s the magic of professional photography. In today’s market, where 95% of buyers start their search online (National Association of Realtors), your photos aren’t just snapshots: they’re the make-or-break moment for a sale. Blurry, dark, or cluttered images can tank interest, while crisp, inviting shots speed up sales and boost offers.
This guide isn’t just about clicking a shutter. We’ll walk you through gear choices, lighting hacks, angle secrets, and editing tricks used by pros (like us at AFK Media). Whether you’re a DIY homeowner or an agent sharpening your skills, you’ll learn how to make every room look spacious, bright, and irresistible. Ready to turn “meh” into “wow”? Let’s dive in.
Choosing the Right Gear

What Equipment Do You Need for Real Estate Photography?
You don’t need Hollywood-level gear to take pro shots, but skimping on basics is like baking a cake without flour. It just won’t rise. Start with a solid camera. Mirrorless cameras (like the Sony α7 series) are lightweight champs with excellent low-light performance, while DSLRs (such as the Canon EOS Rebel) offer rugged reliability and longer battery life. Either works, but prioritize manual controls. Auto mode simply won’t cut it when you’re trying to balance bright windows and dark corners.
Lenses are where the magic happens. Grab a wide-angle lens (10–24mm for crop sensors, 16–35mm for full-frame) to make cramped rooms feel airy. Just avoid ultra-wide “fisheye” lenses, as they warp walls and can turn buyers off. Pair this with a sturdy tripod (the Manfrotto MT190X is a reliable workhorse) to eliminate blur and keep lines straight. Pro tip: add a remote trigger (around $20 on Amazon) to avoid shaky-hand syndrome.

Optional extras? A polarizing filter tames window glare, and battery grips keep you shooting all day. Remember: Great gear simplifies the process, but skill turns pixels into profit.
Read: Essential Equipment Checklist for Real Estate Photographers.
Mastering Lighting Techniques

How to Light Your Space for Maximum Impact
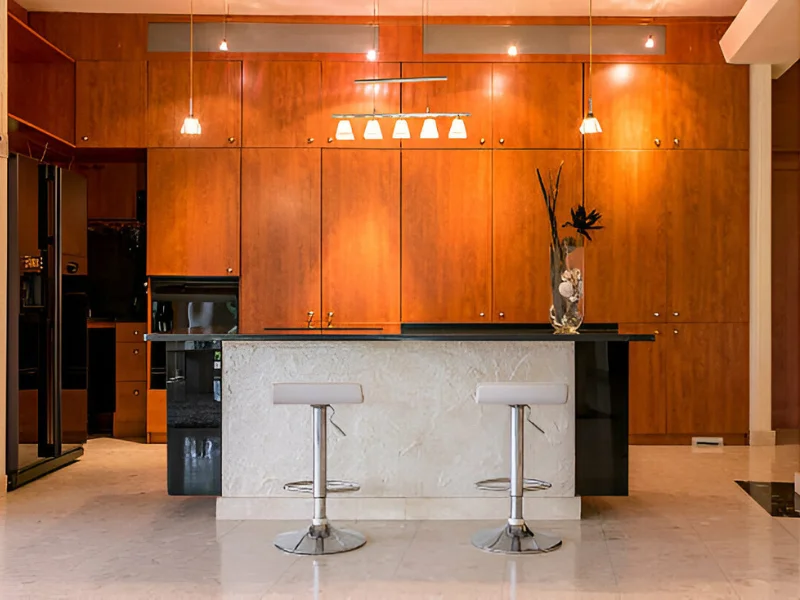
Lighting isn’t just about brightness, it’s about mood. Get it right, and rooms feel warm and inviting; get it wrong, and spaces look like a cave or a sterile lab. Natural light is your best friend, but it’s fickle. Shoot on overcast days for soft, even illumination, or use sheer curtains to diffuse harsh noon sun. For sunrise or sunset shoots, angle shots to capture golden hour glow bouncing off floors (trust us, it makes hardwood floors sing).
But what if it’s dark? Flash can save the day, if used subtly. Never blast it straight at a room. Instead, bounce it off ceilings (white ceilings only) or walls to mimic natural light. For tricky shadows under cabinets or behind furniture, LED video lights (priced around $50 to $200) are game-changers. Place them behind plants or couches to lift shadows without casting weird hotspots.
Shoot real estate exteriors during the true twilight window, about 10–20 minutes after sunset, when the sky has turned a deep blue but it’s not yet fully dark, and interior lights are on to create a warm contrast. This timing captures the “blue hour” effect that enhances curb appeal and buyer attraction.
Avoiding glare? Tape white foam boards opposite windows to bounce light into dark corners. And always turn off overhead lights—they create yellow/orange color clashes. Stick to lamps for cozy accents!
Composition and Angles That Sell
Capturing the Best Angles and Framing the Right Shots
Ever see a photo that makes you feel like you’re in the room? That’s composition doing its job. Start with camera height:
- Living rooms / Bedrooms: Lens at hip height (3 to 4 feet)
- Kitchens: Slightly lower (2.5 to 3 feet) to showcase countertops
- Bathrooms: Chest height to avoid toilet close-ups
Positioning matters too. Standing in a corner (diagonally) makes rooms feel larger than centering your shot. Always show two walls plus the floor to create depth. It’s like giving buyers a virtual tour. Use leading lines (hallways, staircases, kitchen islands) to pull eyes toward key features.

Symmetry is soothing, but don’t overdo it. Frame beds or dining tables dead-center, but offset art or windows slightly for organic balance. And never shoot toward mirrors unless you enjoy editing out your reflection later!
Symmetry’s secret? It anchors a room but feels sterile if overused. Center large focal points (fireplaces, beds) but offset smaller elements like side tables or plants for organic flow. For bathrooms, shoot across the vanity (not head-on) to avoid mirror reflections—unless you want to spend hours clone-stamping yourself out later!
Pro Staging Hack:
Tuck away trash bins, pet bowls, and chargers. Use props strategically:
Coffee mugs on kitchen islands
Folded towels in bathrooms
Books stacked casually on shelves (Less is more. You’re selling space, not clutter)
Post-Processing and Editing Basics
How to Edit Your Real Estate Photos Like a Pro
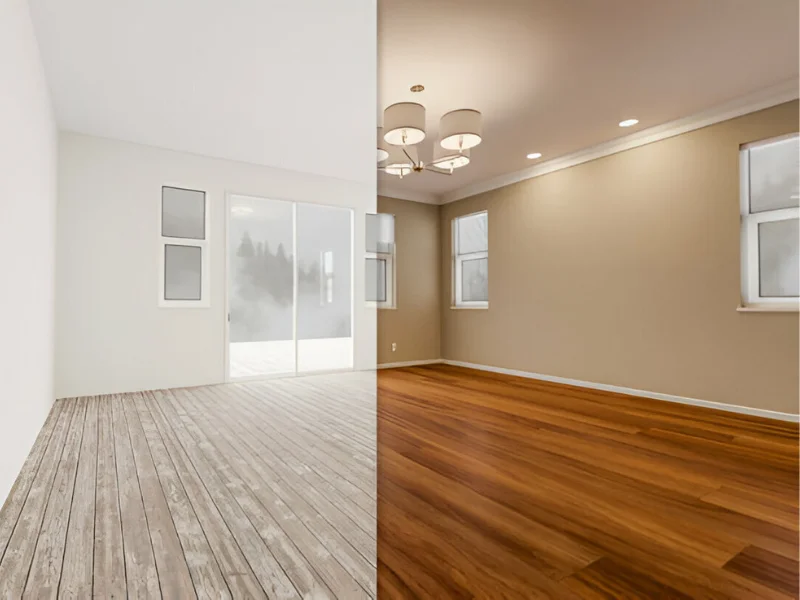
Shooting is half the battle; editing is where “good” becomes “wow.” Start with basic corrections:
- Brightness / Exposure: Lift shadows (especially under furniture) without blowing out windows.
- Contrast: Add subtle depth (10 to 15 points max).
- White Balance: Neutralize yellow or orange casts from bulbs. Aim for clean daylight tones.
Distortion is a deal-breaker. Use Lens Correction (Lightroom’s “Enable Profile Corrections”) to fix wide-angle warping. Then manually straighten vertical lines. No leaning walls allowed.
“Video courtesy of Cole Connor, used under fair use for educational purposes.”
Clutter Removal & Polishing
Spot-heal cords, outlet covers, and scuffs. For complex edits (refrigerator magnets, cars through windows):
Photoshop’s Clone Stamp for textures (grass, walls)
Content-Aware Fill for large areas
Graduated Filters to balance overexposed windows
Tool Recommendations:
| Use Case | Pro Tool | Budget/Mobile Option |
|---|---|---|
| Basic Edits | Lightroom Classic | Adobe Lightroom Mobile |
| Distortion | DxO ViewPoint | Snapseed (Lens Tool) |
| Object Removal | Photoshop | TouchRetouch (iOS/Android) |
Bonus: Using Drones for Exterior Shots
Should You Use a Drone for Real Estate Photography?
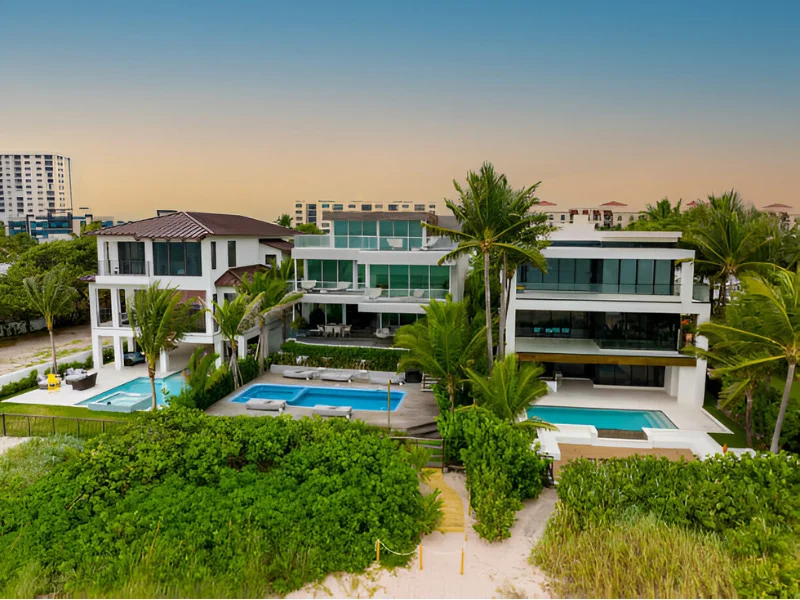
Drones aren’t just cool gadgets, they’re game-changers for curb appeal. A soaring shot reveals what ground photos can’t: roofline integrity, sprawling lot sizes, and neighborhood context (parks, beaches, transit). But they’re not ideal for every property. Use drones when:
The home has acreage, pools, or waterfront views
You need to show proximity to landmarks (schools, trails)
Traditional angles hide unique architecture (such as turrets or courtyards)
Safety first: In Canada, you’ll need a Basic Drone Pilot Certificate (from Transport Canada’s exam) and must follow No-Fly Zones near airports and helipads. Stay under 122 meters in altitude, and never fly over people.

What to Capture (And What to Skip)
Must-shots:
Front elevation at 45° (shows facade + yard)
Backyard flyover highlighting pools/decks
Neighborhood context (distance to water/mountains)
Skip:
Shots where trees/power lines dominate
Blurry twilight flights (drones struggle in low light)
Close-ups of neighbor properties (privacy issues!)
Conclusion
We’ve covered the full blueprint, from gear picks to drone laws, to help transform your real estate photos from amateur to awe-inspiring. Remember:
Great lighting beats expensive cameras
Angles sell space, editing sells perfection
Drones add dimension (but use them wisely)
These techniques level up listings, but mastering them takes practice.
Your Property Deserves the Spotlight

Why DIY when AFK Media’s pros can handle it? We blend cutting-edge tech (4K drones, HDR editing) with creative storytelling to make your property unforgettable. Proudly serving Vancouver’s Lower Mainland since 2018.
Ready to captivate buyers?
➡️ Book a Shoot
➡️ See Our Portfolio
➡️ Questions? Call: (778) 227-1004
Located at 422 Richards St, Vancouver. Coffee’s on us while we plan your shoot! ☕
Latest posts
Popular Posts
Interviews, tips, guides, industry best practices, and news.
