- +1 (778) 227 - 1004
- info@afkmedia.ca
- Vancouver, BC V6B 2Z4

Essential Equipment Checklist for Real Estate Photographers
Introduction Let’s cut to the chase: in real estate photography, your gear is not just a set of tools. It is your silent business partner. The right equipment can transform…

Table of Contents
Introduction
Let’s cut to the chase: in real estate photography, your gear is not just a set of tools. It is your silent business partner. The right equipment can transform a dim, cluttered room into a bright, inviting space that stops potential buyers in their scroll. It is the difference between a listing that lingers and one that sells, and it sells fast. For new photographers, knowing what to buy can feel overwhelming. And for seasoned pros? There is always that nagging question of whether an upgrade is truly worth it.
This checklist is designed to cut through the noise. We will walk you through the absolute essentials, the nice to haves, and what you can safely ignore when you are just starting out. Think of this as your trusted guide to building a kit that delivers professional, consistent results every single time. By the way, this article is a key part of our ultimate guide on how to take real estate photos professionally, so be sure to check that out for more in depth techniques.
Key Takeaways
Before we dive into the nitty gritty, here is a quick snapshot of what we will cover:
The Non Negotiables: The core trio of camera, wide angle lens, and sturdy tripod you simply cannot work without.
Workflow Enhancers: Tools like flash systems and accessories that speed up your shoot and improve your editing.
Smart Investments: What beginners can skip initially to manage their budget without sacrificing baseline quality.
The Power of Add ons: How drones and other tech can elevate your service offering as you grow.
Camera Body — The Foundation

You can have the best lens in the world, but if your camera body cannot capture the data properly, you are fighting a losing battle. The camera is the brain of your operation, and for real estate work, it needs to be good at three specific things: resolving detail, handling challenging light, and producing clean images.
Full frame vs. crop sensor: What is ideal for real estate? This is the big one. A full frame sensor (found in cameras like the Canon R6, Sony a7 series, and Nikon Z6) is generally the gold standard. Why? Because it captures a wider field of view with the same lens compared to a crop sensor camera. In tight spaces like condos or bathrooms, every millimeter counts. Full frame sensors also typically perform better in low light conditions and offer a greater dynamic range. This means they can capture detail in both the bright window light and the dark shadows of a room without blowing out the highlights or losing shadow detail. That said, a crop sensor camera (like a Canon 90D or Sony a6400) can still produce excellent results, especially when paired with an ultra wide lens. It is a more budget friendly starting point, but if you are serious about professionalism, a full frame body is a worthwhile investment.
Resolution, Dynamic Range, and File Formats. You do not need a 50 megapixel monster. For most listing platforms, 20 24 megapixels is more than sufficient. Dynamic range is far more critical. It is your camera’s ability to see into the bright and dark areas simultaneously. As renowned architectural photographer Scott Hargis notes, “Dynamic range is the single most important specification for an architectural or real estate photographer.” Always shoot in RAW format, not JPEG. RAW files contain significantly more data, giving you the flexibility to correct white balance and recover those shadows and highlights in post production. It is the digital negative, and it is non negotiable for professional work.

Lenses — The Wide Angle Advantage

If the camera body is the brain, the lens is the eye. And in real estate, you need a wide eyed view. The single most important piece of gear for making spaces look large, open, and inviting is a wide angle lens. It is the workhorse that lets you capture entire rooms without having to back yourself into a corner.
Focal length: Why 16–24mm is the sweet spot. On a full frame camera, a 16 35mm zoom lens is arguably the perfect tool. The 16mm end gives you that breathtaking, expansive view of living areas and master bedrooms. Zooming to 24mm or 35mm is perfect for capturing details like a fireplace or a custom built kitchen island without distortion. On a crop sensor camera, you will need to account for the crop factor (usually around 1.5x or 1.6x). So a 10 22mm lens would give you a similar field of view. The key is to avoid going too wide, like with a fisheye lens, as it creates unnatural, curved lines that are a nightmare to correct and can misrepresent the space. You want to impress, not deceive.
Prime vs. zoom lenses and managing distortion. Zooms, like a 16 35mm, offer incredible flexibility, allowing you to compose shots quickly without changing lenses. Prime lenses (fixed focal length) often have larger maximum apertures, making them better in extremely low light. But their lack of flexibility usually makes them less practical for the fast paced nature of real estate shoots. Regardless of your choice, all wide angle lenses exhibit some distortion. The goal is to minimize it by keeping your camera as level as possible. Tipping the camera up or down is what causes those leaning walls (converging verticals). The best real estate photographers know that using a tripod and a spirit level is the first step to controlling this, which we will talk about next. Post processing software can fix the rest, but getting it right in camera saves hours of editing.
Tripod — Your Stability Partner
It might seem like the most boring piece of gear, but a good tripod is what separates the amateurs from the pros. When you are shooting interiors, you are often working with slower shutter speeds to allow enough light in without cranking the ISO and introducing noise. Hand holding the camera at slow speeds is a recipe for blurry images. A tripod guarantees tack sharp photos every time.
Why tripods are non negotiable for interior shooting. Beyond just preventing camera shake, a tripod forces you to slow down and compose your shot deliberately. It allows you to use base ISO (like 100) for the cleanest image quality. It also enables techniques like HDR (High Dynamic Range) bracketing, where you take multiple exposures of the same scene and blend them later. This is essential for balancing bright windows with darker room interiors. Trying to hand hold a 3 or 5 exposure bracket is practically impossible without introducing alignment issues.
What to look for: height, stability, and spirit levels. You want a tripod that extends to your eye level without raising the center column too much, as extending the column reduces stability. Look for robust brands like Manfrotto or Benro. This is not the place to skimp. A flimsy tripod is worse than no tripod. Crucially, your tripod must have a built in spirit level, or your tripod head must have one. This little bubble is your best friend for ensuring the camera is perfectly level. That is the foundational step for avoiding those distorted walls we mentioned earlier. A remote shutter release or your camera’s app is the final piece of the puzzle, eliminating any shake caused by pressing the shutter button.
Flash & Lighting Gear
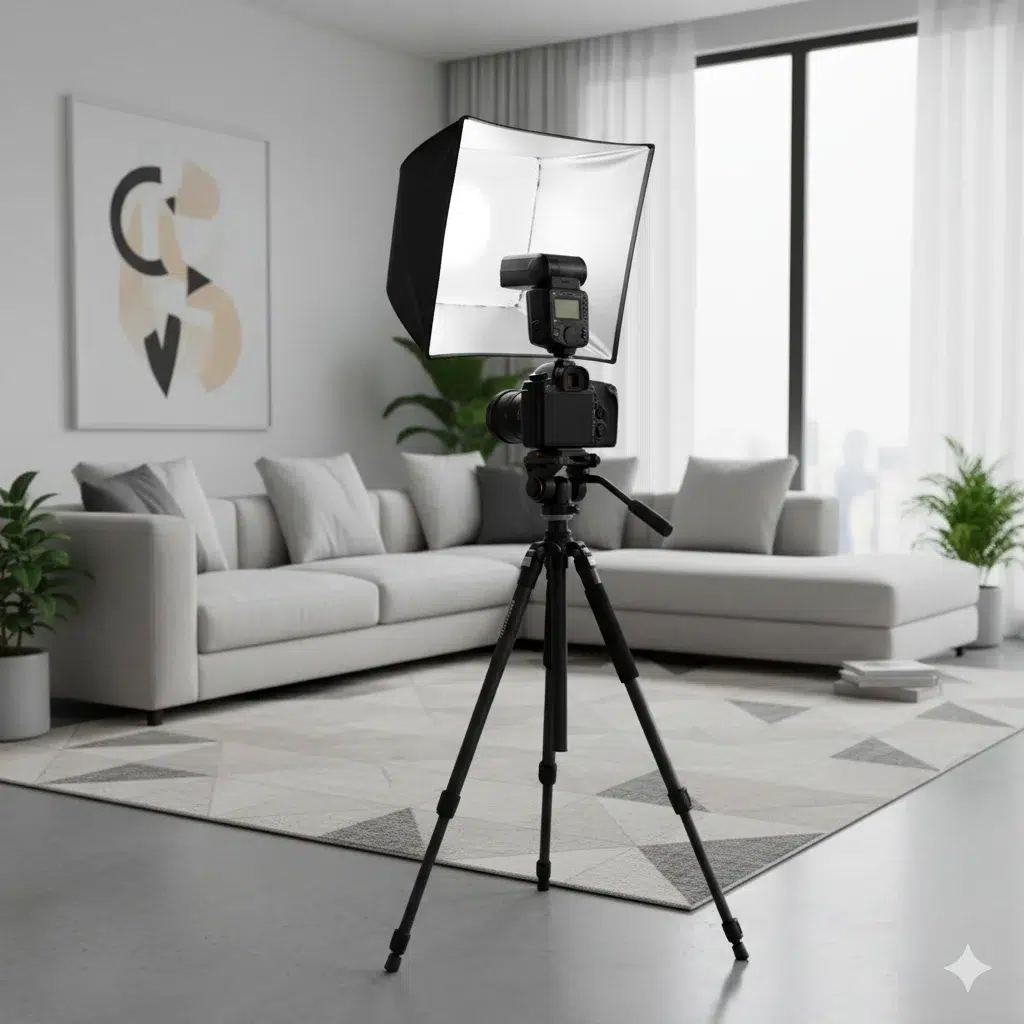
Natural light is a real estate photographer’s best friend, until it is not. When the sun is blazing through the windows or a room has dark, shadowy corners, you need to take control. That is where artificial lighting comes in. The goal is not to create a studio like look, but to balance the ambient light and fill in shadows, mimicking a bright, naturally well lit space.
When you need flash (and when not to use it). The golden rule is to enhance, not overpower. You will typically use flash in two scenarios. First, to fill in dark areas that natural light is not reaching (like a far corner of a large living room). Second, to balance a bright window with a darker interior. This is often called “flambé” (flash and ambient balance). The key is to bounce the flash off a white ceiling or wall to create a soft, diffuse light source that feels natural. Avoid pointing the flash directly at your subject. That is a surefire way to create harsh shadows and that dreaded “hotspot” look. Sometimes, if the natural light is perfectly soft and even, you might not need flash at all. Knowing when to use it is a skill that separates good photographers from great ones.
Flash brackets, diffusers, and the LED alternative. To effectively bounce light, a flash mounted directly on your camera hot shoe is not ideal. A flash bracket that positions the flash above and slightly to the side of your lens allows for more directional bouncing. It avoids the flat look of on camera flash. A diffuser, like a small softbox or a bounce card, can further soften the light. Alternatively, continuous LED panels are becoming increasingly popular. They allow you to see the lighting effect in real time, which is fantastic for beginners. However, they are often not as powerful as a strobe and can struggle to compete with bright daylight. For most pros, a powerful speedlight (like a Godox V1 or Profoto A1) used off camera with a bracket is the most versatile tool.
“Video courtesy of Nathan Cool Photo, used under fair use for educational/informational purposes.”
Accessories That Make Life Easier
These are the unsung heroes of your kit. They are the small, often inexpensive items that prevent big headaches on a shoot. Forgetting one of these can mean a wasted trip or hours of frustration in post production.
Remote shutter, white balance tools, and power. Let us break down the essentials:
Remote Shutter/Intervalometer: Even on a tripod, pressing the shutter button can cause vibrations. A simple remote shutter release (wired or wireless) or using your camera’s smartphone app ensures absolute stability. An intervalometer is also crucial if you plan on creating twilight photos by blending multiple exposures over time.
Grey Card/White Balance Tool: Getting accurate colors is critical. Auto White Balance (AWB) can be fooled by strong wall colors or light bulbs. Taking a reference shot with a grey card or a dedicated white balance target (like a Expodisc) allows you to set a perfect custom white balance in seconds during editing. This ensures whites look white in every room.
Extra Batteries and Memory Cards: Running out of power or storage mid shoot is unprofessional. Always carry at least two extra batteries and multiple high capacity, fast memory cards. Cameras with dual card slots are worth their weight in gold for instant backup.
The cleaning kit you should not ignore. Dust is the enemy of clarity. Dust spots on your sensor will show up as blurry grey smudges in every single photo. They are especially noticeable in clear sky shots through windows. A rocket blower and a sensor cleaning kit are essential for regular maintenance. A simple lens cloth and lens cleaning solution will keep your front element spotless. A quick check and clean before every shoot will save you from a tedious spotting process in Photoshop later.
Optional But Powerful Add Ons

Once you have mastered the essentials and your business is growing, these tools can help you offer more premium services and stand out from the competition. They represent an investment, but one that can significantly increase your value to real estate agents.
Drones for Breathtaking Aerial Perspectives. An aerial shot is no longer a luxury for high end properties. It is becoming an expectation for many listings. A drone captures the property’s context. It shows the neighborhood, the lot size, proximity to amenities, and the overall roof condition in a way that ground level photos simply cannot. When choosing a drone, look for models with high resolution cameras, reliable GPS hold, and obstacle avoidance sensors for safety and smooth operation. At AFK Media, our cinematic drone videos provide a stunning bird’s eye view that truly showcases a property’s full potential.
360 Cameras for Immersive Virtual Tours. The next best thing to an open house is a fully interactive virtual tour. 360 degree cameras allow you to capture every angle of a room. These captures can then be stitched together into a walkthrough experience. This technology has become incredibly accessible and is a huge selling point for agents who want to engage out of town buyers. It is a powerful tool that increases listing engagement and time on site.
Gimbals and Sliders for Cinematic Video. Still photos are essential, but video content is king for social media and premium listings. A gimbal (a motorized stabilizer) allows you to create smooth, walking tour videos without the shakiness of handholding. A slider adds production value for elegant, slow moving shots of details like a kitchen countertop or a fireplace. Combining these tools with your photography skills allows you to offer complete real estate media packages.
Conclusion: Building Your Kit for Success
Building your real estate photography equipment kit is a journey, not a single purchase. Start with the solid foundation: a capable camera body, a reliable wide angle lens, and a sturdy tripod. This core trio will allow you to deliver professional quality results from day one.
As you book more jobs, reinvest in your business by adding lighting gear to conquer challenging conditions and the essential accessories that make your workflow seamless and reliable. Finally, consider the powerful add ons like drones and 360 cameras as your business scales. This allows you to offer the comprehensive visual marketing that today’s competitive market demands.
Remember, the best gear is the gear that helps you tell a compelling visual story. It is not about having the most expensive equipment. It is about knowing how to use the right tools to make a property shine. If you are looking to ensure your property gets the absolute best visual presentation without the investment in time and equipment, that is where a specialized team comes in.
Give Your Property the Spotlight It Deserves with AFK Media
As you can see, creating stunning real estate visuals requires the right equipment, technical expertise, and a creative eye. While this guide equips you with the knowledge, why leave it to chance?
The team at AFK Media lives and breathes this stuff. We are your local experts in the Lower Mainland, using cutting edge technology and proven techniques to capture properties in their best light. We handle all the technical details so you can focus on what you do best.
Ready to see the difference professional media makes?

Contact AFK Media today to book a session and let us create a visual story for your property that captivates potential buyers and commands attention.
Explore Our Portfolio: See examples of our stunning photography, video tours, and drone work.
Book a Consultation: Let us discuss how we can highlight your property’s unique features.
Follow Us on Social Media: Get inspired by our latest projects.
Your property deserves the AFK Media advantage.
Latest posts
Popular Posts
Interviews, tips, guides, industry best practices, and news.
